Introduction to magiceyer
MagicEye.Rmd
library(magiceyer)
library(imager)
#> Loading required package: magrittr
#>
#> Attaching package: 'imager'
#> The following object is masked from 'package:magrittr':
#>
#>     add
#> The following objects are masked from 'package:stats':
#>
#>     convolve, spectrum
#> The following object is masked from 'package:graphics':
#>
#>     frame
#> The following object is masked from 'package:base':
#>
#>     save.image
The magiceyer package provides tools for creating
autostereograms (Magic Eye images) and performing various types of
steganography (hiding data in images or datasets).
Autostereograms
Autostereograms are 2D images that create the illusion of a 3D scene when viewed correctly.
Basic Usage
To create a stereogram, you need a depth map (a grayscale image where brightness represents distance).
# Create a depth map from text
met <- getmet("R", w = 400, h = 400, cex = 100)
# Generate a stereogram
me <- getme(met, len = 80)
plot(me, axes = FALSE)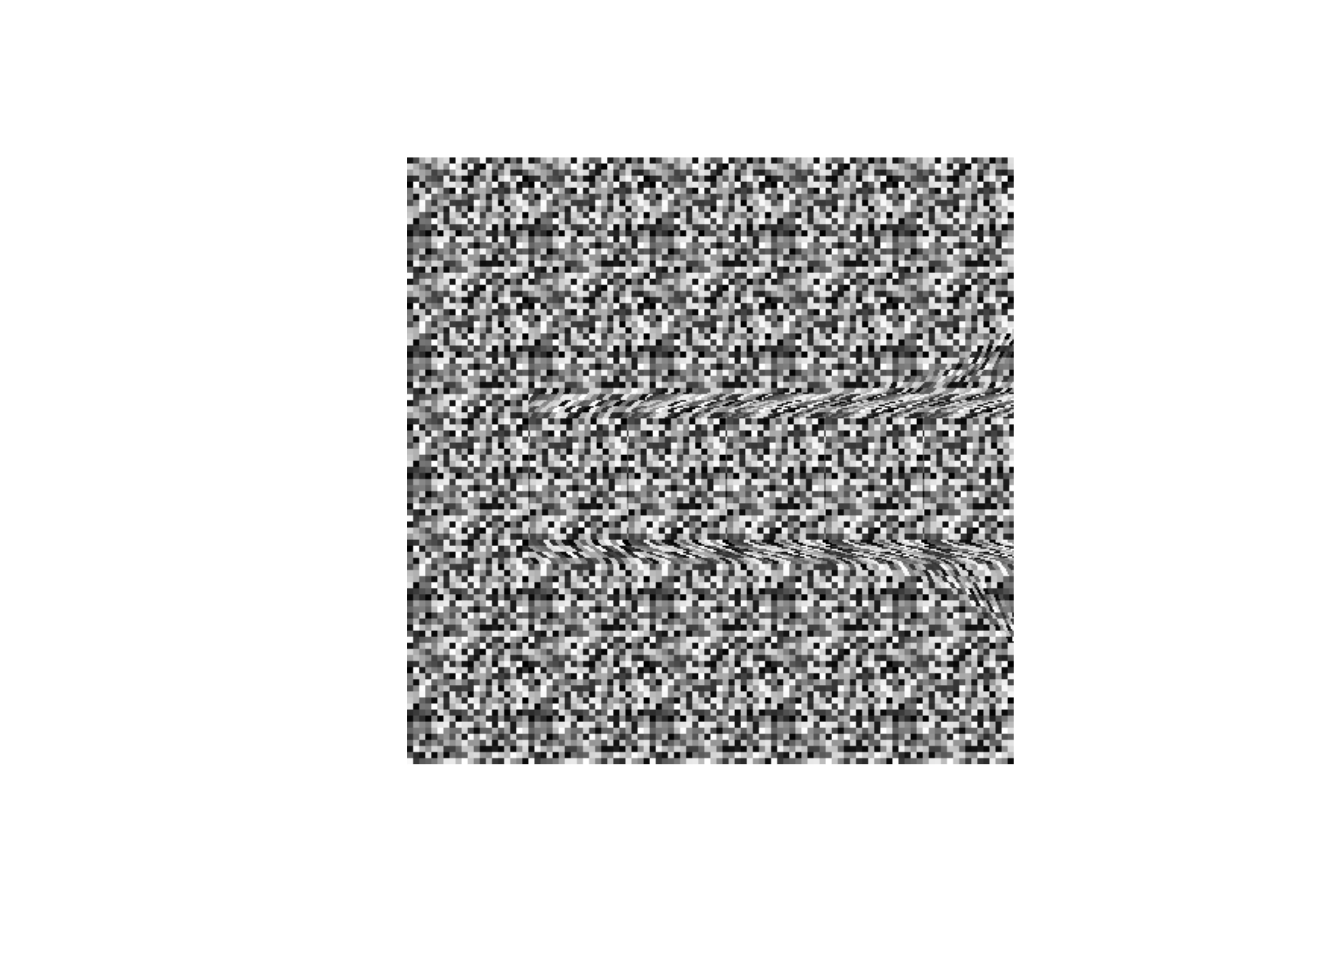
Advanced Stereograms
You can also use textures from other images or create QR-code based stereograms.
Textured Stereograms
# Use an image as the texture for the stereogram
logo <- system.file("extdata", "logo.png", package = "imager")
mei <- getmei(logo, text = "MAGIC", len = 100)
plot(mei, axes = FALSE)
QR Code Stereograms
The hideqr function creates a stereogram where the
repeating pattern is a QR code. The 3D hidden message is visible with
parallel vision, while the QR code itself remains scannable.
hideqr("OK", url = "https://yufree.cn", file = "qr_stego.png")Steganography
magiceyer supports two main types of steganography: LSB
(Least Significant Bit) and Regression-based.
LSB Steganography
This method hides text in the least significant bits of an image’s pixels. The change is invisible to the human eye.
# Hide text
logo <- system.file("extdata", "logo.png", package = "imager")
stego_hide(logo, "Secret Message", out = "stego.png")

# Reveal text
revealed <- stego_reveal("stego.png")
print(revealed)
Regression Steganography
Based on methods by Staudenmayer & Stefanski, this technique constructs a fake regression dataset where the hidden image is only visible in the residual plot.
# Hide text in a dataset
dat <- stego_lm_hide_text("DATA", size = 100)
#> Image points: 9597 (100x100 at cutoff=0.5)
#> Regression dataset created: 9997 obs x 6 cols (R^2 ~ 0.05)

# The dataset looks like normal numeric data
head(dat)
#>          Y        X1         X2         X3         X4          X5
#> 1 1.262181 -2.580233 -0.3481247 -0.3396885 -1.1721847  0.58625608
#> 2 1.269825 -4.651927  0.8001269 -1.0040321 -0.5909041  1.27437690
#> 3 1.277469  0.429976 -1.1449351 -0.2080011 -1.4065235 -0.38469113
#> 4 1.285113 -2.089467 -0.6928469  0.3217326 -0.3708074 -0.77421389
#> 5 1.292757  2.256118 -0.6821912 -2.1383008 -1.0273312  1.18869986
#> 6 1.300401 -4.981561 -0.8098430  1.0766656 -0.5050578  0.06894717

# Reveal by plotting residuals
stego_lm_reveal(dat, main = "Hidden in Residuals")
Triple-Layer Steganography (Combo Mode)
The stego_combo function is the ultimate tool in
magiceyer. it creates an image with three layers of
information:
- Public Layer: A scannable QR code.
- Visual Layer: A 3D hidden message (visible by parallel viewing).
-
Digital Layer: A secret text hidden in the pixel
bits (invisible and needs
stego_reveal).
# Create the combo image
stego_combo(text_3d = "YES",
            text_lsb = "The meeting is at midnight.",
            url_qr = "https://yufree.cn",
            out = "combo.png")

# Reveal the LSB secret
stego_reveal("combo.png")
The “Inception” Mode: Ultra Nesting Steganography
For even deeper concealment, stego_ultra embeds a
complete regression dataset into the pixels. The secret
is only revealed when the dataset is extracted and its residual plot is
generated.
# Create the ultra-nested image
stego_ultra(text_final = "SECRET AGENT",
            text_3d = "YES",
            url_qr = "https://yufree.cn",
            out = "ultra.png",
            lm_size = 30)

# 1. Reveal bits to get the RDS raw data
raw_dat <- stego_reveal("ultra.png", decompress = TRUE, as_raw = TRUE)

# 2. Unserialize to get the dataframe
dat <- unserialize(raw_dat)

# 3. Plot residuals to see the final secret
stego_lm_reveal(dat)